Balluff

Why RFID is the VIP of 2019

The “most popular” annual lists don’t usually come out until the end of the year, but I think it is worth mentioning now three applications that have gained substantial momentum this year. With the Smart Factory concept being driven around the globe, RFID has emerged from the shadows and taken its place in the spotlight. The demand for a larger amount of data, more security, and increased visibility into the production process has launched RFID into a leading role when it comes to automation.

Machine Access Control

When considering RFID being utilized for access control, they think about readers located near doorways either outside the building or within the plant. While those readers operate much like the industrial readers, they typically cannot communicate over an industrial communication protocol like Ethernet/IP, Profinet, or IO-Link.  With an industrial access control reader one can limit access to HMIs, PLCs, and various control systems by verifying the user and allowing access to the appropriate controls.  This extra layer of security also ensures operator accountability by identifying the user.

Machine Tool ID

RFID has been used in machining centers for decades. However, it was used mostly in larger scale operations where there were acres of machines and hundreds of tools. Today it’s being used in shops with as few as one machine. The ROI is dependent on the number of tool changes in a shift; not necessarily just the number of machines and the number of tools in the building. The greater the number of tool changes, the greater the risk of data input errors, tool breakage, and even a crash.

Content verification

Since RFID is capable of reading through cardboard and plastic, it is commonly used to verify the contents of a container. Tags are fixed to the critical items in the box, like a battery pack or bag of hardware, and passed through a reader to verify their presence. If, in this case, two tags are not read at the final station then the box can be opened and supplied with the missing part before it ships. This prevents an overload on aftersales support and ensures customers get what they ordered.

While RFID is still widely used to address Work in Process (WIP), asset tracking, and logistics applications, the number of alternative applications involving RFID has skyrocketed due to an increase in demand for actionable data.  Manufacturing organizations around the world have standardized on RFID as a solution in cases where accountability, reliability and quality are critical.


cropped-cmafh-logo-with-tagline-caps.pngCMA/Flodyne/Hydradyne is an authorized  Balluff distributor in Illinois, Wisconsin, Iowa and Northern Indiana.

In addition to distribution, we design and fabricate complete engineered systems, including hydraulic power units, electrical control panels, pneumatic panels & aluminum framing. Our advanced components and system solutions are found in a wide variety of industrial applications such as wind energy, solar energy, process control and more.

How to Select the Best Lighting Techniques for Your Machine Vision Application

Guest contributor,  Dan Simmons, Balluff

The key to deploying a robust machine vision application in a factory automation setting is ensuring that you create the necessary environment for a stable image.  The three areas you must focus on to ensure image stability are: lighting, lensing and material handling.  For this blog, I will focus on the seven main lighting techniques that are used in machine vision applications.

On-Axis Ring Lighting

On-axis ring lighting is the most common type of lighting because in many cases it is integrated on the camera and available as one part number. When using this type of lighting you almost always want to be a few degrees off perpendicular (Image 1A).  If you are perpendicular to the object you will get hot spots in the image (Image 1B), which is not desirable. When the camera with its ring light is tilted slightly off perpendicular you achieve the desired image (Image 1C).

Off-Axes Bright Field Lighting

Off-axes bright field lighting works by having a separate LED source mounted at about 15 degrees off perpendicular and having the camera mounted perpendicular to the surface (Image 2A). This lighting technique works best on mostly flat surfaces. The main surface or field will be bright, and the holes or indentations will be dark (Image 2B).

Dark Field Lighting

Dark field lighting is required to be very close to the part, usually within an inch. The mounting angle of the dark field LEDs needs to be at least 45 degrees or more to create the desired effect (Image 3A).  In short, it has the opposite effect of Bright Field lighting, meaning the surface or field is dark and the indentations or bumps will be much brighter (Image 3B).

Back Lighting

Back lighting works by having the camera pointed directly at the back light in a perpendicular mount.  The object you are inspecting is positioned in between the camera and the back light (Image 4A).  This lighting technique is the most robust that you can use because it creates a black target on a white background (Image 4B).

Diffused Dome Lighting

Diffused dome lighting, aka the salad bowl light, works by having a hole at the top of the salad bowl where the camera is mounted and the LEDs are mounted down at the rim of the salad bowl, pointing straight up which causes the light to reflect off of the curved surface of the salad bowl and it creates very uniform reflection (Image 5A).  Diffused dome lighting is used when the object you are inspecting is curved or non-uniform (Image 5B). After applying this lighting technique to an uneven surface or texture, hotspots and other sharp details are deemphasized, and it creates a sort of matte finish to the image (Image 5C).

Diffused On-Axis Lighting

Diffused on-axis lighting, or DOAL, works by having a LED light source pointed at a beam splitter and the reflected light is then parallel with the direction that the camera is mounted (Image 6A).  DOAL lighting should only be used on flat surfaces where you are trying to diminish very shiny parts of the surface to create a uniformed image.  Applications like DVD, CD, or silicon wafer inspection are some of the most common uses for this type of lighting.

6A
Image 6A


Structured Laser Line Lighting

Structured laser line lighting works by projecting a laser line onto a three-dimensional object (Image 7A), resulting in an image that gives you information on the height of the object.  Depending on the mounting angle of the camera and laser line transmitter, the resulting laser line shift will be larger or smaller as you change the angle of the devices (Image 7B).  When there is no object the laser line will be flat (Image 7C).

Real Life Applications 

The images below, (Image 8A) and (Image 8B) were used for an application that requires the pins of a connector to be counted. As you can see, the bright field lighting on the left does not produce a clear image but the dark field lighting on the right does.

This next example (Image 9A) and (Image 9B) was for an application that requires a bar code to be read through a cellophane wrapper.  The unclear image (Image 9A) was acquired by using an on-axis ring light, while the use of dome lighting (Image 9B) resulted in a clear, easy-to-read image of the bar code.

This example (Image 10A), (Image 10B) and (Image 10C) highlights different lighting techniques on the same object. In the (Image 10A) image, backlighting is being used to measure the smaller hole diameter.  In image (Image 10B) dome lighting is being used for inspecting the taper of the upper hole in reference to the lower hole.  In (Image 10C) dark field lighting is being used to do optical character recognition “OCR” on the object.  Each of these could be viewed as a positive or negative depending on what you are trying to accomplish.


cropped-cmafh-logo-with-tagline-caps.png

CMA/Flodyne/Hydradyne is an authorized  Balluff distributor in Illinois, Wisconsin, Iowa and Northern Indiana.

In addition to distribution, we design and fabricate complete engineered systems, including hydraulic power units, electrical control panels, pneumatic panels & aluminum framing. Our advanced components and system solutions are found in a wide variety of industrial applications such as wind energy, solar energy, process control and more.

Boost Connectivity with Non-Contact Couplings

Guest contributor, Shishir Rege, Balluff

In press shops or stamping plants, downtime can easily cost thousands of dollars in productivity. This is especially true in the progressive stamping process where the cost of downtime is a lot higher as the entire automated stamping line is brought to a halt.

BIC presse detail 231013

Many strides have been made in modern stamping plants over the years to improve productivity and reduce the downtime. This has been led by implementing lean philosophies and adding error proofing systems to the processes. In-die-sensing is a great example, where a few inductive or photo-eye sensors are added to the die or mold to ensure parts are seated well and that the right die is in the right place and in the right press. In-die sensing almost eliminated common mistakes that caused die or mold damages or press damages by stamping on multiple parts or wrong parts.

In almost all of these cases, when the die or mold is replaced, the operator must connect the on-board sensors, typically with a multi-pin Harting connector or something similar to have the quick-connect ability. Unfortunately, often when the die or mold is pulled out of the press, operators forget to disconnect the connector. The shear force excreted by the movement of removing the die rips off the connector housing. This leads to an unplanned downtime and could take roughly 3-5 hours to get back to running the system.

image

Another challenge with the multi-conductor connectors is that over-time, due to repeated changeouts, the pins in the connectors may break causing intermittent false trips or wrong die identification. This can lead to serious damages to the system.

Both challenges can be solved easily with the use of a non-contact coupling solution. The non-contact coupling, also known as an inductive coupling solution, is where one side of the connectors called “Base” and the other side called “Remote” exchange power and signals across an air-gap. The technology has been around for a long time and has been applied in the industrial automation space for more than a decade primarily in tool changing applications or indexing tables as a replacement for slip-rings. For more information on inductive coupling here are a few blogs (1) Inductive Coupling – Simple Concept for Complex Automation Part 1,  (2) Inductive Coupling – Simple Concept for Complex Automation Part 2

For press automation, the “Base” side can be affixed to the press and the “Remote” side can be mounted on a die or mold, in such a way that when the die is placed properly, the two sides of the coupler can be in the close proximity to each other (within 2-5mm). This solution can power the sensors in the die and can help transfer up to 12 signals. Or, with IO-Link based inductive coupling, more flexibility and smarts can be added to the die. We will discuss IO-Link based inductive coupling for press automation in an upcoming blog.

Some advantages of inductive coupling over the connectorized solution:

  • Since there are no pins or mechanical parts, inductive coupling is a practically maintenance-free solution
  • Additional LEDs on the couplers to indicate in-zone and power status help with quick troubleshooting, compared to figuring out which pins are bad or what is wrong with the sensors.
  • Inductive couplers are typically IP67 rated, so water ingress, dust, oil, or any other environmental factor does not affect the function of the couplers
  • Alignment of the couplers does not have to be perfect if the base and remote are in close proximity. If the press area experiences drastic changes in humidity or temperature, that would not affect the couplers.
  • There are multiple form factors to fit the need of the application.

In short, press automation can gain a productivity boost, by simply changing out the connectors to non-contact ones.


cropped-cmafh-logo-with-tagline-caps.png

CMA/Flodyne/Hydradyne is an authorized  Balluff distributor in Illinois, Wisconsin, Iowa and Northern Indiana.

In addition to distribution, we design and fabricate complete engineered systems, including hydraulic power units, electrical control panels, pneumatic panels & aluminum framing. Our advanced components and system solutions are found in a wide variety of industrial applications such as wind energy, solar energy, process control and more.

Improve Your Feeder Bowl System (and Other Standard Equipment) with IO-Link

Guest contributor: Tom Rosenberg, Balluff

One of the most common devices used in manufacturing is the tried and true feeder bowl system. Used for decades, feeder bowls take bulk parts, orient them correctly and then feed them to the next operation, usually a pick-and-place robot. It can be an effective device, but far too often, the feeder bowl can be a source of cycle-time slowdowns. Alerts are commonly used to signal when a feed problem is occurring but lack the exact cause of the slow down.

feeder bowl

A feed system’s feed rate can be reduced my many factors. Some of these include:

  • Operators slow to add parts to the bowl or hopper
  • Hopper slow to feed the bowl
  • Speeds set incorrectly on hopper, bowl or feed track
  • Part tolerance drift or feeder tooling out of adjustment

With today’s Smart IO-Link sensors incorporating counting and timing functions, most of the slow-down factors can be easily seen through an IIoT connection. Sensors can now time how long critical functions take. As the times drift from ideal, this information can be collected and communicated upstream.

A common example of a feed system slow-down is a slow hopper feed to the bowl. When using Smart IO-Link sensors, operators can see specifically that the hopper feed time is too long. The sensor indicates a problem with the hopper but not the bowl or feed tracks. Without IO-Link, operators would simply be told the overall feed system is slow and not see the real problem. This example is also true for the hopper in-feed (potential operator problem), feed track speed and overall performance. All critical operations are now visible and known to all.

For examples of Balluff’s smart IO-Link sensors, check out our ADCAP sensor.


cropped-cmafh-logo-with-tagline-caps.pngCMA/Flodyne/Hydradyne is an authorized  Balluff distributor in Illinois, Wisconsin, Iowa and Northern Indiana.

In addition to distribution, we design and fabricate complete engineered systems, including hydraulic power units, electrical control panels, pneumatic panels & aluminum framing. Our advanced components and system solutions are found in a wide variety of industrial applications such as wind energy, solar energy, process control and more.

What to Ask Before You Build an RFID System to Meet Your Traceability Needs

Guest contributor, Balluff

overview_rfid

An industrial RFID system is a powerful solution for reliably and comprehensively documenting individual working steps in manufacturing environments. But an industrial RFID system that meets your application needs isn’t available off-the-shelf. To build the system you need, it is important to consider what problems you hope RFID will solve and what return on investments you hope to see.

RFID can deliver many benefits, including process visibility and providing data needed to better manage product quality. It can be used to improve safety, satisfaction and profit margins. It can even be used to help comply with regulatory standards or to manage product recalls. And RFID can be used in a wide range of applications from broad areas like supply management to inventory tracking to more specific applications. These improvements can improve time, cost or performance—though not typically all three.

It is essential to understand and document the goal and how improvements will be measured to in order to plan a RFID system (readers, antennas, tags, cables) to best meet those goals.

Other important questions to consider:

Will the system be centralized or de-centralized? Will the system be license plate only or contain process data on the tag?

How will the data on the tags be used?  Will the information be used to interface with a PLC, database or ERP? Will it be used to provide MES or logical functionality? Or to provide data to an HMI or web browser/cloud interface?

Will the system be required to comply with any international regulations or standards? If so, which ones: EPC Global, Class 1 Gen 2 (UHF only), ISO 15693, or 14443 (HF only)?

What environment does the system need to perform in? Will it be used indoor or outdoor? Will it be exposed to liquids (cleaning fluids, coolants, machine oils, caustics) or high or low temperatures?

Does the RFID system need to work with barcodes or any other human readable information?

What are the performance expectations for the components? What is the read/write range distance from head to tag? What is the station cycle timing? Is the tag metal-mounted? Does the tag need to be reused or be disposable? What communication bus is required?

With a clear set of objectives and goals, the mechanical and physical requirements discovered by answering the questions above, and guidance from an expert, a RFID system can be configured that meets your needs and delivers a strong return on investment.

cropped-cmafh-logo-with-tagline-caps.pngCMA/Flodyne/Hydradyne is an authorized  Balluff distributor in Illinois, Wisconsin, Iowa and Northern Indiana.

In addition to distribution, we design and fabricate complete engineered systems, including hydraulic power units, electrical control panels, pneumatic panels & aluminum framing. Our advanced components and system solutions are found in a wide variety of industrial applications such as wind energy, solar energy, process control and more.

When to Use Hygienic Design vs. Washdown

Guest Contributor: Christine Rühling, Balluff

Both washdown and hygienic design are common terms used in the food and beverage industry, and are increasingly being used in the packaging industry. These terms are used in different scenarios and easily confused with each other. What exactly are the differences between them, and in what applications are each used?

Why are hygienic design and washdown needed?

The consumer, and more specifically, the health of the consumer is the core concern of the food and beverage industry. Contaminated food can pose a danger to life and limb. A product recall damages the image of a company, costs a lot of money and as a worst case scenario can lead to the complete closing of the company. To prevent such scenarios, a producers primary objective is to make sure that the food is safe and risk-free for the consumer.image 1
In food manufacturing and packaging plants, a differentiation is made between the food area (in direct contact with the product), the spray area (product-related) and the non-food area. The requirements of the machine components are different depending on which area they are in.

The Food Area

In the food area the food is unpacked, or partially unpacked, and particularly susceptible to contamination. All components and parts that may come in contact with the food must not adversely affect this, e.g. in terms of taste and tolerability.
The following needs to be considered to avoid contamination:

  • Hygiene in production
  • Use of food contact materials
  • Food-grade equipment in Hygienic Design

These requirements result in the need for components that follow the hygienic design rules. If the component supplier fulfills these rules, the machine manufacturer can use the components and the producer can use the machines without hesitation.

Hygienic Design

Many component suppliers offer different solutions for hygienic design and each supplier interprets the design differently. So what does hygienic design mean? What must be included and which certifications are the right ones?

  • The material used must be FoodContact Material (FCM). This means that the material is non-corrosive, non-absorbent and non-contaminating, disinfectable, pasteurisable and sterilizable.
  • Seals must be present to prevent the ingress of microorganisms.
  • The risk of part loss must be minimized.
  • Smooth surfaces with a radius of < 0.8 μm are permitted.
  • There must be no defects, folds, breaks, cracks, crevices, injection-molded seams, or joints, even with material transitions.
  • There must be no holes or depressions and no corners of 90°.
  • The minimum radius should be 3 mm.

Supporting institutions and related certifications

There are different institutions which confirm and verify the fulfillment of these rules. They also support the companies during the development process.
image2
EHEDG – The European Hygienic Engineering and Design Group offers machine builders and component suppliers the possibility to evaluate and certify their products according to Hygienic Design requirements.
image33A – 3-A Sanitary Standards, Inc. (3-A SSI) is an independent, non-profit corporation in the U.S. for the purpose of improving hygiene design in the food, beverage and pharmaceutical industries. The 3-A guidelines are intended for the design, manufacture and cleaning of the daily food           accessories used in handling, manufacturing and packaging of edible products with high hygiene requirements.
image4FDA – The Food and Drug Administration is a federal agency of the United States Department of Health and Human Services, one of the United States federal executive departments. Among other things, the FDA is responsible for food safety.

What does a hygienic design product look like?

Below is an example of a hygienic design product.


  • Stainless steel housing VA 1.4404
  • Laser marking
  • Protection class IP69K (IEC 60529)
  • Active surface made of PEEK
  • EHEDG conform
  • FDA conform

Since the product contacting area is associated with high costs for the plant manufacturer and the operator, it’s beneficial to keep it as small as possible.

The Spray Area

In the spray area, there are different requirements than in the food area.
Depending on the type of food that is processed, a further distinction is made between dry and wet areas.

image6
Areas in the food and beverage production

Here we are talking about the washdown area. Washdown capable areas are designed for the special environmental conditions and the corresponding cleaning processes.

Washdown

Components which fulfill washdown requirements usually have the following features:

  • Cleaning agent/corrosion resistant materials (often even food compliant, but this is not a must)
  • High protection class (usually IP 67 and IP 69K)
  • Resistant to cleaning agents
image7
Photoelectric sensor for washdown requirements

Ecolab and Diversey are two well-known companies whose cleaning agents are used for appropriate tests:
Ecolab Inc. and Diversey Inc. are US based manufacturers of cleaning agents for the food and beverage industry. Both companies offer certification of equipment’s resistance to cleaning agents. These certificates are not prescribed by law and are frequently used in the segments as proof of stability.
The washdown component must also be easy and safe to clean. However, unlike the hygienic design, fixing holes, edges and threads are permitted here.

For basic information on IP69K see also this previous blog post.
To learn more about solutions for washdown and hygienic design click here.

cropped-cmafh-logo-with-tagline-caps.pngCMA/Flodyne/Hydradyne is an authorized  Balluff distributor in Illinois, Wisconsin, Iowa and Northern Indiana.

In addition to distribution, we design and fabricate complete engineered systems, including hydraulic power units, electrical control panels, pneumatic panels & aluminum framing. Our advanced components and system solutions are found in a wide variety of industrial applications such as wind energy, solar energy, process control and more.


Improving sawmill yield through automation

Guest contributor: Christian Holder, Balluff

It is not a surprise that optimizing yield is one of the most important objectives in a sawmill (or lumber mill) as it is in any other industry. The big difference is that there is hardly any control over the quality of the logs that enter the sawill. In the ideal world all logs are not only cylindrical in shape but also straight. But obviously each individual log is unique in shape. Crooked, out-of-round, or tapered logs are common and even worse: usually it is a combination of these shapes.

Still the target is to recover as much yield from each log as possible. Therefore sawmills turn into highly automated factories with three dimensional (3D) measurement of logs, and advanced equipment for primary and secondary breakdown. Basically there are three areas of automation in a sawmill:

  1. 3D measurement for optimum cutting pattern to recover most yield from a log
  2. Automation of drives to position the log itself, or tools (e.g. sawblades, knifes, canter heads…) at high velocity to increase throughput
  3. Automation of log and lumber handling to minimize the gap between the logs

All of the three areas support the sawmill’s target to get the most out of the logs at the highest speed. The worst case is any downtime as it directly impacts the whole log to lumber process. Therefore electrical engineers look for sensors that meet the challenges of the sawmill environment. Mainly sensors must meet high vibration and shock standards. As they are exposed to the environment, protective housings help to protect the sensors from logs crashing into them.

From logs to lumber

Wave feeder with analog distance sensor

To efficiently process logs to lumber, sawmills use dedicated equipment for different sizes of logs. As a result bigger mills have a primary and a secondary breakdown area. Independent from the logs, sawmills aim to minimize the gaps and to avoid changes in the setup. This allows them to run faster and to increase the production rate. Here is the process how a log turns into lumber in a sawmill.

When a log arrives at the mill it is indexed onto the infeed conveyer (could be a step feeder or log loader). Either inductive sensors sequence the steps. Or a magnetostrictive position sensor (linear transducer) provides feedback of the step position of the loader to control motion and speed. Once the log is on the loader analog distance sensors determine the distance to the end of the log from the side of the loader wall.

This is to ensure a constant distance between the logs (log gap) as they enter the sawmill. Knowing the distance enables them to control when the log is loaded on the conveyor. And thereby they can control the gap. As an alternative photoelectric a thru beam sensor determines if a log is present for the final two steps on a loader. These sensors work with a long measuring range. Additionally they have a large functional reserve and are very resistant to dirt and dust.

Primary breakdown – from raw log to slabs and cants

The first step of the log is to run through a debarker that removes the bark. As there are tolerances in shape, linear transducers and photoelectric analog distance sensors are used to determine log sizes. These sizes help to adjust the debarker’s pressure and speed. After debarking the logs are cut to the best pre-determined length by cut-off or bucking saws. Again linear transducers are used to control the motion of the cut-off saw swing.

By stacking some photoelectric through beam sensors they can be used to determine the log diameter roughly. This leads to increasing speed as the saw can cut through smaller logs faster and has to slow down for larger logs. Many mills just sort their debarked logs into “large logs” and “small logs” based on their diameters.  And then go into machines that are set up for those particular log sizes.

Log carriage for 20″ (50cm) logs and more

Carriage saw using BTL for clamping and positioning
Carriage saw with BTL for positioning

Many mills also run a lot of larger logs and therefore have a log carriage. This is a single band saw with a carriage that runs on railway style tracks. The carriage has three or four knees that have positioners and log clamps (dogs) that hold the log. In the knees hydraulic cylinders with magnetostrictive transducers position the log. Even under extreme surrounding conditions, these position sensors guarantee a high machine and system availability. The clamps hold the log while it movesthrough the band saw. The carriage cuts the logs into slabs (two flat, two rounded sides) or into cants (four flat, square sides).

Secondary Breakdown – from small logs, slabs and cants to lumber

Mills that run smaller logs do not have to break down the logs prior to putting them through the secondary breakdown equipment. After the cut-off saw, the small logs will be sorted by size into bins. Step feeders index them again onto a conveyor and that feeds them through a Scanner into the small log line machine. To recover as much yield as possible log turners turn the logs in the optimum position. Chipper canters center them to enable curve sawing, which leads to increased lumber recovery.

Hydraulic drives dominate small log lines and all motion control happens with linear position transducers. Typical small log lines consist of log turning and centering, chipping with canter heads, saw box slew and skew, saw box positioniers, profiling heads and outfeed pickers. All of the equipments’ design aims for speed and therefore they require fast and accurate position feedback. Sensors and transducers must withstand high shock and vibration. Balluff’s products survive even in toughtest environments and undergo intensive shock and vibration testing.

Shifting edgers and curve sawing

Edgers using BTL for curve sawing
Sawblade Adjustment with BTL

Gang edgers and shifting edgers cut cants and slabs from the primary breakdown into boards. Gang edgers have circular saws stacked at fixed spacing. Shifting edgers look similar to gang edgers except that they change spacing  between saw blades can be changed. Therefore each saw is connected to a hydraulic positioner. A scanner looks at the cant or slab and determines the best solutions of cuts to produce best results. After the scanner the positioners of the shifting edgers set the new saw spacing to match that solution.

Edger optimizers pre-position the board and optimize the infeed to get the best payback from the machine. Photoelectric (laser) retroreflective sensors  track boards through the ducker table. The infeed position cylinder (with integrated linear transducer) skews the board in the best position to be fed in the edger.

Trimming, sorting, stacking, strapping, shipping

Photoelectric sensors detect boards at the trimmer infeed

The boards go into bins when they come out of the edgers. Another scanner determines if the board can be cut down into shorter boards. Or if a damaged end needs to be cut off so that the board is not graded lower. The next step is processing the board through a trimmer. The trimmer is a set of up to about a dozen circular saws positioned across the conveyor. It can cut longer boards down into two or three shorter boards or just trim the ends.

Photoelectric analog distance sensors detect stacked boards from high distance

Background suppression photoelectric sensors at the indeed of the trimmer look down at the board as it goes into the machine. And they determine if the board is actually as long as the scanner information indicates. The same sensors confirm after the trimmer that the board was cut down to the proper size. After the trimmer they go into a sorter and and from there to stacking and strapping to final shipment.

We provide additional information how our sensors help to automate sawmills on our website.

Veneer instead of solid wood

A sawmill produces solid wood. This means that the board is out of one piece of wood. Another type of boards is veneer. This means that thin layers of wood are glued together to reach a board. Usually these layers are less that 3 mm thick. A lathe continuously turns a log against a blade to peel it. With each rotation the log becomes thinner. Therefore the blade position needs to be adjusted. Hydraulic cylinders with integrated linear transducers centerthe log and position the blade to peel the trunk. The thin layers are glued together in a veneer press.

Not only stationary, but also portable sawmills

In the end our sensors and transducers not only help to automate huge mills, but also portable sawmills. Magnetostrictive or magnetically sensors enable operators to exactly position the saw unit. So they achieve accurate and fast cutting of boards. Wood-Mizer is a world leading supplier of efficient and fast portable sawmills that uses magnetostrive position sensors in it’s machines. The reasons for Balluff are its product and service quality as well as the availability.

cropped-cmafh-logo-with-tagline-caps.png

CMA/Flodyne/Hydradyne is an authorized  Balluff distributor in Illinois, Wisconsin, Iowa and Northern Indiana.

In addition to distribution, we design and fabricate complete engineered systems, including hydraulic power units, electrical control panels, pneumatic panels & aluminum framing. Our advanced components and system solutions are found in a wide variety of industrial applications such as wind energy, solar energy, process control and more.

The Emergence of Device-level Safety Communications in Manufacturing

Guest Contributor: Tom Knauer, Balluff

Manufacturing is rapidly changing, driven by trends such as low volume/high mix, shorter life cycles, changing labor dynamics and other global factors. One way industry is responding to these trends is by changing the way humans and machines safely work together, enabled by updated standards and new technologies including safety communications.

In the past, safety systems utilized hard-wired connections, often resulting in long cable runs, large wire bundles, difficult troubleshooting and inflexible designs. The more recent shift to safety networks addresses these issues and allows fast, secure and reliable communications between the various components in a safety control system. Another benefit of these communications systems is that they are key elements in implementing the Industrial Internet of Things (IIoT) and Industry 4.0 solutions.

Within a typical factory, there are three or more communications levels, including an Enterprise level (Ethernet), a Control level (Ethernet based industrial protocol) and a Device/sensor level (various technologies). The popularity of control and device level industrial communications for standard control systems has led to strong demand for similar safety communications solutions.

Safety architectures based on the most popular control level protocols are now common and often reside on the same physical media, thereby simplifying wiring and control schemes. The table, below, includes a list of the most common safety control level protocols with their Ethernet-based industrial “parent” protocols and the governing organizations:

Ethernet Based Safety Protocol Ethernet Based Control Protocol Governing Organization
CIP Safety Ethernet IP Open DeviceNet Vendor Association (ODVA)
PROFISafe PROFINET PROFIBUS and PROFINET International (PI)
Fail Safe over EtherCAT (FSoE) EtherCAT EtherCAT Technology Group
CC-Link IE Safety CC-Link IE CC-Link Partner Association
openSAFETY Ethernet POWERLINK Ethernet POWERLINK Standardization Group (EPSG)


These Ethernet-based safety protocols are high speed, can carry fairly large amounts of information and are excellent for exchanging data between higher level devices such as safety PLCs, drives, CNCs, HMIs, motion controllers, remote safety I/O and advanced safety devices. Ethernet is familiar to most customers, and these protocols are open and supported by many vendors and device suppliers – customers can create systems utilizing products from multiple suppliers. One drawback, however, is that devices compatible with one protocol are not compatible with other protocols, requiring vendors to offer multiple communication connection options for their devices. Other drawbacks include the high cost to connect, the need to use one IP address per connected device and strong influence by a single supplier over some protocols.

Device level safety protocols are fairly new and less common, and realize many of the same benefits as the Ethernet-based safety protocols while addressing some of the drawbacks. As with Ethernet protocols, a wide variety of safety devices can be connected (often from a range of suppliers), wiring and troubleshooting are simplified, and more data can be gathered than with hard wiring. The disadvantages are that they are usually slower, carry much less data and cover shorter distances than Ethernet protocols. On the other hand, device connections are physically smaller, much less expensive and do not use up IP addresses, allowing the integration into small, low cost devices including E-stops, safety switches, inductive safety sensors and simple safety light curtains.

Device level Safety Protocol Device level Standard Protocol Open or Proprietary Governing Organization
Safety Over IO-Link/IO-Link Safety* IO-Link Semi-open/Open Balluff/IO-Link Consortium
AS-Interface Safety at Work (ASISafe) AS-Interface (AS-I) Open AS-International
Flexi Loop Proprietary Sick GmbH
GuardLink Proprietary Rockwell Automation

* Safety Over IO-Link is the first implementation of safety and IO-Link. The specification for IO-Link Safety was released recently and devices are not yet available.

The awareness of, and the need for, device level safety communications will increase with the desire to more tightly integrate safety and standard sensors into control systems. This will be driven by the need to:

  • Reduce and simplify wiring
  • Add flexibility to scale up, down or change solutions
  • Improve troubleshooting
  • Mix of best-in-class components from a variety of suppliers to optimize solutions
  • Gather and distribute IIoT data upwards to higher level systems

Many users are realizing that neither an Ethernet-based safety protocol, nor a device level safety protocol can meet all their needs, especially if they are trying to implement a cost-effective, comprehensive safety solution which can also support their IIoT needs. This is where a safety communications master (or bridge) comes in – it can connect a device level safety protocol to a control level safety protocol, allowing low cost sensor connection and data gathering at the device level, and transmission of this data to the higher-level communications and control system.

An example of this architecture is Safety Over IO-Link on PROFISafe/PROFINET. Devices such as safety light curtains, E-stops and safety switches are connected to a “Safety Hub” which has implemented the Safety Over IO-Link protocol. This hub communicates via a “black channel” over a PROFINET/IO-Link Master to a PROFISafe PLC. The safety device connections are very simple and inexpensive (off the shelf cables & standard M12 connectors), and the more expensive (and more capable) Ethernet (PROFINET/PROFISafe) connections are only made where they are needed: at the masters, PLCs and other control level devices. And an added benefit is that standard and safety sensors can both connect through the PROFINET/IO-Link Master, simplifying the device level architecture.

Safety

Combining device level and control level protocols helps users optimize their safety communications solutions, balancing cost, data and speed requirements, and allows IIoT data to be gathered and distributed upwards to control and MES systems.

cropped-cmafh-logo-with-tagline-caps.pngCMA/Flodyne/Hydradyne is an authorized  Balluff distributor in Illinois, Wisconsin, Iowa and Northern Indiana.

In addition to distribution, we design and fabricate complete engineered systems, including hydraulic power units, electrical control panels, pneumatic panels & aluminum framing. Our advanced components and system solutions are found in a wide variety of industrial applications such as wind energy, solar energy, process control and more.

The Evolution of RFID in Metalworking

Guest contributor: Nadine Brandstetter, Balluff

RFID – A key technology in modern production

It’s not just IIoT that has focused attention on RFID as a central component of automation. As a key technology, radio frequency identification has been long established in production. The inductive operating principle guarantees ruggedness and resistance to environmental stress factors. This makes the system highly reliable in function and operation. With unlimited read/write cycles and real-time communication, RFID has become indispensable. The beginnings for the industrial use of RFID go far back. RFID was first successfully used on machine tools in the mid-1980’s. Since the usage of RFID tags on cutting tool holders has been internationally standardized (ISO 7388 for SK shanks, ISO12164 for HSK shanks), there has been strong growth of RFID usage in cutting tool management.

Cutting tool in tool taper with RFID chip

Track-and-trace of workpieces

Modern manufacturing with a wide bandwidth of batch sizes and ever compressed production times demands maximum transparency. This is the only way to meet the high requirements for flexibility and quality, and to minimize costs. Not only do the tools need to be optimally managed, but also the finished parts and materials used must be unambiguously recognized and assigned.

Workpiece tracking with RFID on pallet system

RFID frequencies LF and HF – both RFID worlds come together

In terms of data transmission for cutting tool identification, established systems have settled on LF (Low Frequency), as this band has proven to be especially robust and reliable in metal surroundings. Data is read with LF at a frequency of 455 kHz and written at 70 kHz.

When it comes to intralogistics and tracking of workpieces, HF (High Frequency) has become the standard in recent years. This is because HF systems with a working frequency of 13.56 MHz offer greater traverse speeds and a more generous read/write distance.

As a result, RFID processor units have been introduced that offer frequency-independent application. By using two different read-/write heads (one for tool identification and one for track-and-trace of workpieces) that each interface to a single processor unit, the communication to the control system is achieved in an economical manner.

RFID processor for both tool identification and workpiece tracking

New Hybrid Read-Write Head

Industrial equipment is designed for a working life of 20 years or even more. Therefore, in production you often find machines which were designed in the last century next to new machines that were installed when the production capacity was enlarged. In such a brown field factory you have the coexistence of proven technology and modern innovative equipment. For the topic of industrial RFID, it means that both low frequency and high frequency RFID tags are used. To use both the existing infrastructure and to introduce modern and innovative equipment, RFID read/write heads have been recently developed with LF and HF technology in one housing. It does not matter whether a LF RFID tag or a HF RFID tag approaches the RFID head. The system will automatically detect whether the tag uses LF or HF technology and will start to communicate in the right frequency.

This hybrid read-write head adds flexibility to the machine tools and tool setters as you can use the entire inventory of your cutting tools and tool holders.

RFID Tool ID tag ready for the Cloud

The classical concept of data storage in Tool ID is a decentralized data storage, which means that all relevant data (tool dimensions, tool usage time, machining data, etc.) of a tool/tool holder is stored on the RFID tag which is mounted on the single tool holder. The reliability and availability of this concept data has been proven for more than 25 years now.

With the Internet of Things IIOT, the concept of cloud computing is trendy. All — tool setter, machine tool and tool stock systems — are connected to the cloud and exchange data. In this case only an identifier is needed to move and receive the data to and from the cloud. For this type of data management Tool ID tags with the standard (DIN 69873) size diameter 10 x 4,5 mm are available now in a cost effective version with a 32 Byte memory.

Evergreen – more modern than ever

Learn more about the Evolution of RFID in Metalworking at www.balluff.com  o

Collaborative Automation…It’s Not Just for Robots

Guest Contributor: Tom Rosenberg, Balluff

Manufacturing is made up of hundreds of discrete operations. Some are repetitive, while others are more diverse. Repetitive tasks are ideal for automation while diverse tasks require more flexibility. And while automation can be extremely flexible, that comes with a high initial investment costs and significant deployment time. The alternative? People!

Humans have the unrivaled ability to adapt to a diverse and flexible manufacturing environment. They can be productive relatively quickly with proper guidance without high initial cost investments.

But as we all know, “to err is human” and this is one of the biggest issues with manual operations. People need a little guidance from time to time. Collaboration is not just for robots; It’s for complete automation systems as well.

Collaborative automation is most important at the point-of-use, where humans are performing critical operations. Some of those common operations include:

  • Manual assembly for low volume or highly flexible operations
  • Delivery of raw materials to the point-of-use
  • Kit assembly for down-stream operation
  • Machine setup and change-over
  • Machine maintenance and calibration

All of these functions can be done error-free and with little training by simply guiding people within their current work envelope, also referred to as their point-of-use. This type of a lean function provides hands-free guidance in the form of indication devices connected directly to your automation system allowing workers to stay focused on the task at hand instead of looking elsewhere for instructions.

With the technology of IO-Link, smart indication devices can now show much more information to all the people involved in specific manufacturing tasks. Automation has an immediate and direct connection to the people that are so vital.

For example, in a manually-fed weld-cell, the smart indicators are capable of not only signaling that the part is loaded correctly, but also whether the part is out of alignment (shown here by the red indicator) or that something wrong with one of the automation components such as a stuck pneumatic clamp.

Figure 1
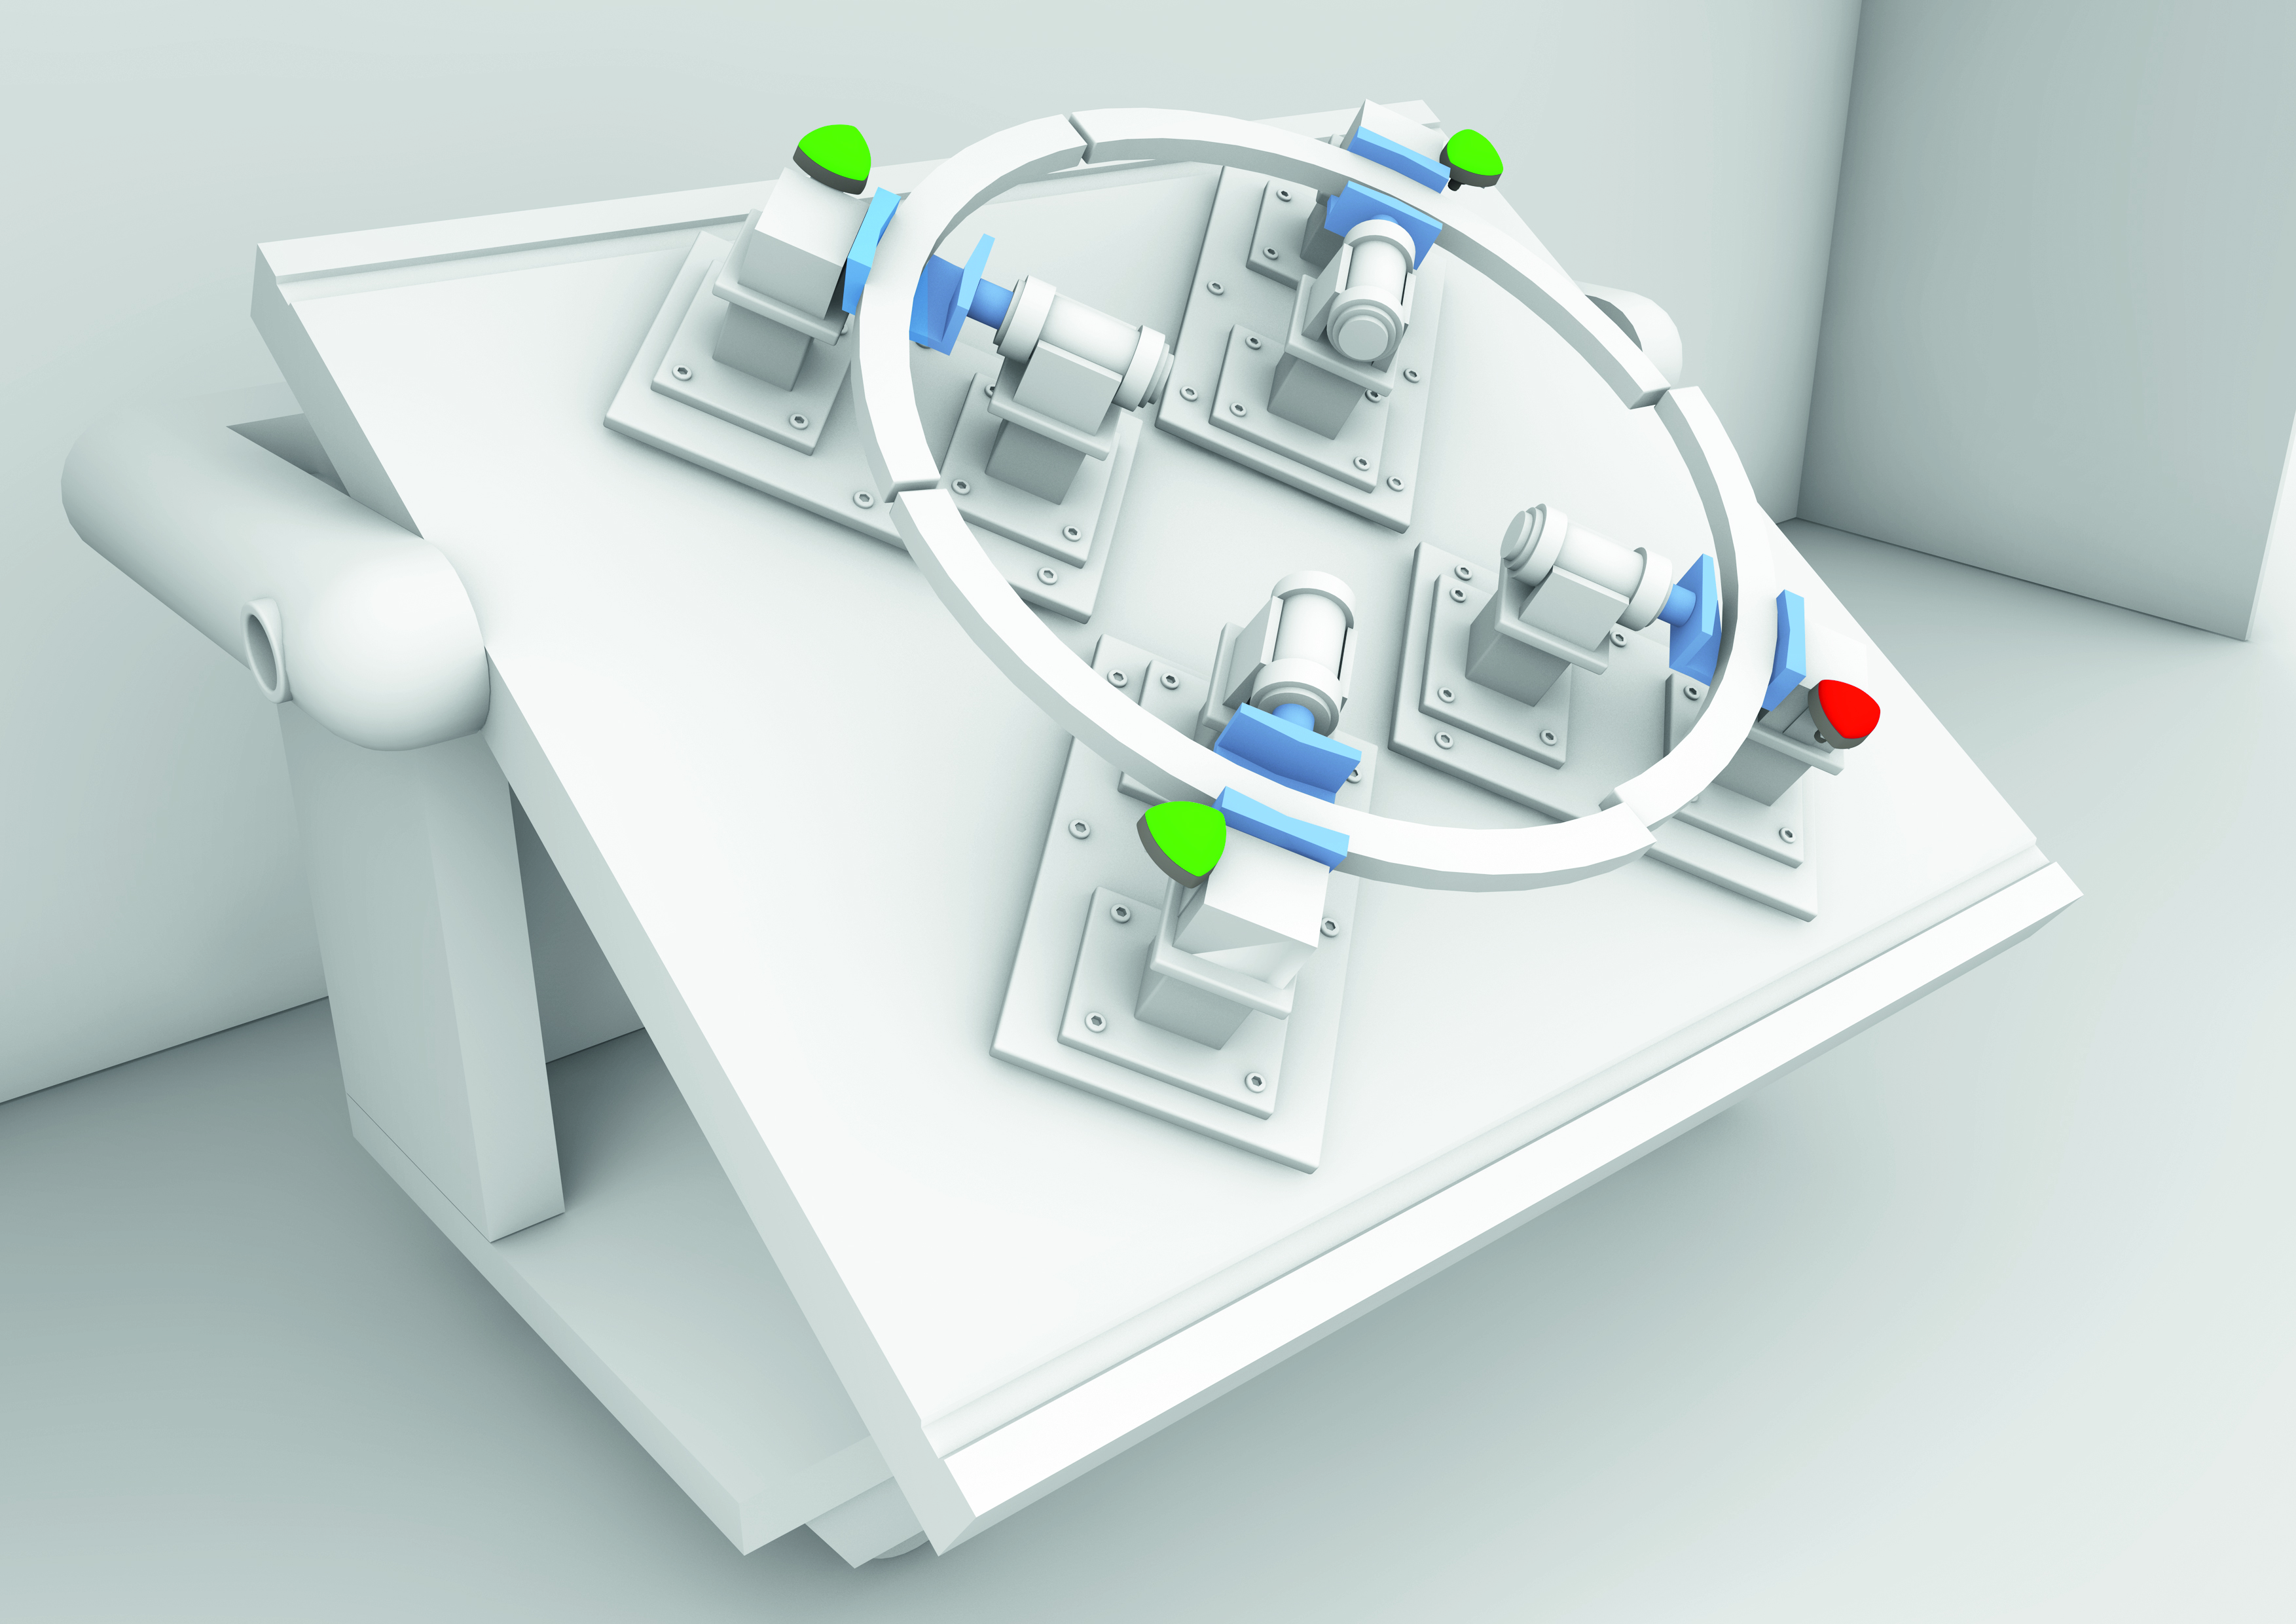
A manually-fed weld-cell with smart indicators is capable of not only signaling that the part is loaded correctly, but also if the part is out of alignment (shown by the red indicator) or that there is something wrong with one of the automation components such as a stuck pneumatic clamp.

Even better, with IIoT technology, trends can be analyzed to determine if the fixture/tool could be optimized for production or to identify common failure points. This all leads to tighter collaboration with operations, maintenance personnel and production supervisors.

A traditional kitting station, sometimes referred to as a supermarket, is another ideal application for smart indicators. Not only can they guide a single operator to the intended part to pull, they can guide multiple operators at the same time.  Also, smart indicators can inform of incorrect pulls, potential bin options (a physically closure bin), directional information, and inventory levels. And again, with IIoT technology, trends can be analyzed to determine proper layout, individual personnel performance and system throughput. The automation system collaborates with operations, forklift drivers and production supervisors.

Regal_v06_01_V3A traditional kitting station, sometimes referred to as a supermarket, with smart indicators to guide operators to the intended part to pull.

So, take a look and see what a collaborative automation system utilizing smart indicators can do for your manual operations. You might be surprised.